

Introduction to django with Creating a Simple helloworld App
In this post, we will install Django and will create our first app.
Prepare Environment
Create Directory
First, let’s create a different directory for our django project.
$ mkdir django_tut
$ cd django_tut/
Create and Activate Virtual Environment
Now, let’s create a virtual environment using Miniconda/Anaconda. You can also use pipenv
If you do not know, how to install Miniconda/Anaconda, visit this post first:
Data Science Work Environment setup on Linux/Mac
$ conda create --name django python=3.6
$ source activate django
Install Django
Now, let’s install django using pip
$ pip install django==2.1
Create First Project
Create Project
A project may have several apps running within it.
We will create our first project named first_project in the current directory.
$ django-admin startproject first_project .
Run Server
Now, run the following command to launch our server.
$ python manage.py runserver
Let’s open http://127.0.0.1:8000/ in the browser. If we have the following page, django has been succesfully installed.

Create First App
Create App
Let’s create our first app named hello.
$ python manage.py startapp hello
Connect app with project
We have created our first app. However, the django Project does not know about it yet.
So, to connect the app with the project, let’s open the file settings.py under first_project directory and add hello under INSTALLED_APPS. Check the last line, we have added hello in the list.
# Application definition
INSTALLED_APPS = [
'django.contrib.admin',
'django.contrib.auth',
'django.contrib.contenttypes',
'django.contrib.sessions',
'django.contrib.messages',
'django.contrib.staticfiles',
'hello',
]
Create a view
Now, let’s create a view for the target URL.
To do that, we will open the file views.py under hello directory which looks like as follows:
from django.shortcuts import render
# Create your views here.
Now, let’s add the following lines:
from django.shortcuts import render
from django.http import HttpResponse

# Create your views here.
# View is created as functions
def createView(request):
	return HttpResponse('Hello World')
Here, we have created a view named createView and used HttpResponse to print Hello World on the screen.
Now, let’s restart the server.
$ python manage.py runserver
Now, let’s open http://127.0.0.1:8000/hello in the browser. However, we see, it doesn’t work (page not found).
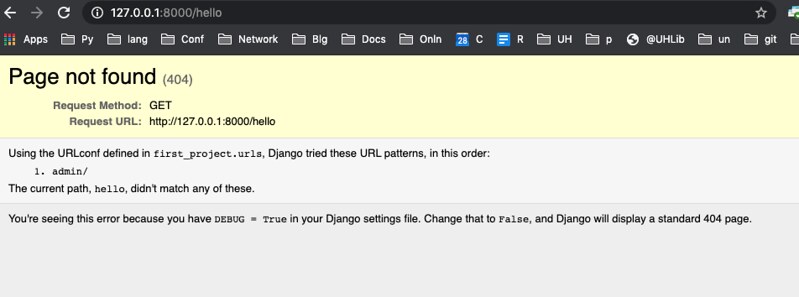
This means, we will have to create a URL for our app.
Create URL
So, we will have to create and link the url in file urls.py under first_project directory again.
If we open the file. it will look like as follows:
from django.contrib import admin
from django.urls import path

urlpatterns = [
path('admin/', admin.site.urls),
]
Now, let’s create a custom URL for our app.
from django.contrib import admin
from django.urls import path
from hello.views import createView

urlpatterns = [
path('admin/', admin.site.urls),
path('hello/', createView),
]
Now, reload the browser page and it will work just fine.

Reference
-
[Watch me build a real startup with Python and JavaScript Web Development Build A Startup #1](https://www.youtube.com/watch?v=UyQn0BhVqNU) - Making a Hello World App with Django | Web Development | Build a Startup #2

Leave a comment