

Amazon Web Service: Launch an AWS EC2 Instance
AWS is one of the most popular cloud platform for hosting small to large scale applications and many companies use AWS as their base hosting platform.
In this post, we will see, how to launch an AWS EC2 instance and how to ssh/copy files in an instance. Before proceeding, create a free account (valid for a year) in AWS; then follow the procedures mentioned in this post.
Launch an AWS EC2
After clicking the Launch Instance button, you have to perform the following seven steps
Step 01: Choose an Amazon Machine Image (AMI)
Select one of the AMI type presented in the webpage. As a beginner always choose any of the free tier eligible AMI so that you will not have to pay anything. You can select the Amazon Linux AMI which is free to use.

Step 02: Choose Instance Type
Choose one from the available options. Here, t.2micro has the free tier eligible tag.

Step 03: Configure Instance Details
You can leave it as it is. If you want to launch multiple similar instances at the same type, increase the number of instances.

Step 04: Add Storage
You can leave it as it is as well. In case you need to change the default storage size (8 GB) or other configurations (e.g., encryption/ volume type/ adding new volume), you can configure settings on this wizard.

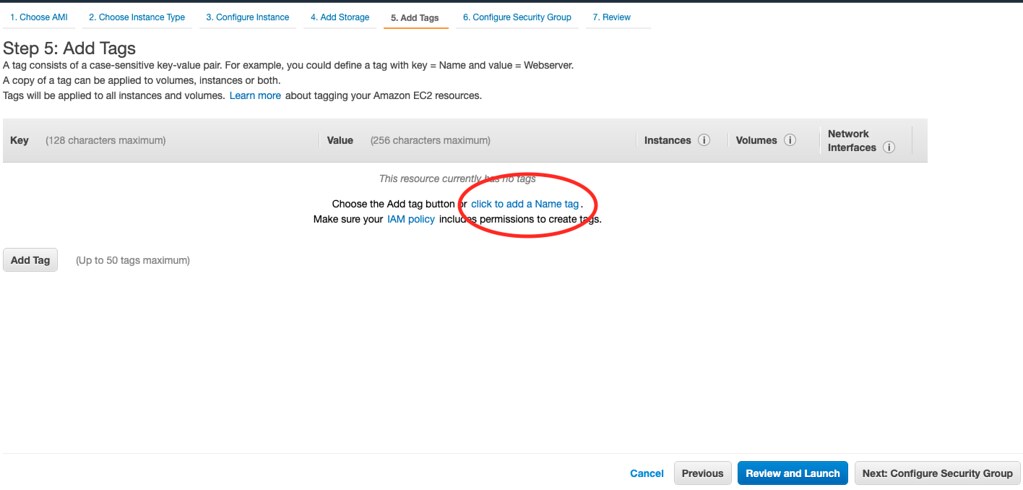
Step 05: Add Tag
Just add a name tag for your instances. This will help you to differentiate between your instances if there are many.
Step 06: Configure Security Group
You can assign new security groups here for each instance or multiple instances at the same time. Security groups usually have a number of policies including ones for different services, open ports, or incoming/outgoing traffics. We can configure it later while launching an app in an instance. In a later post, we will also create a private network of instances where we will have to configure networking using these security groups. For now, use any name you want.

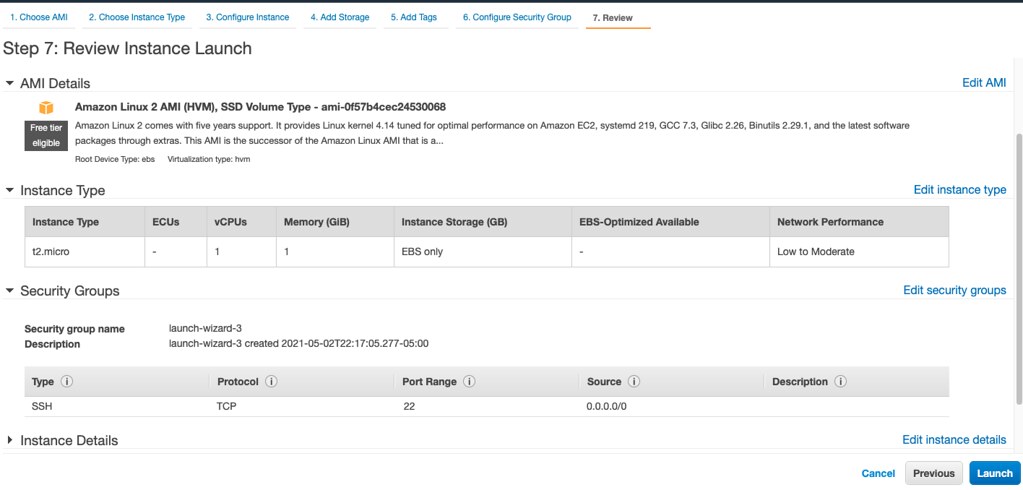
Step 07: Review Instance Launch
This is the last step where you can see the configured settings performed in all previous steps. Review and click on Launch.
After clicking on Launch, you will see a new dialog box that asks you to create a new key-pair or use an existing one. If this is your first instance, create a new one as you do not have any existing one. For later created instances you can create new key-pairs for each or use the same one for each. If you create a new one, it will be downloaded in your computer. We will see, how to remotely login to a instance using that key-pair.

Log in to the AWS EC2 from terminal
Dashboard
This is a sample dashboard after creating three amazon EC2 instances.

Connecting to EC2
I copied the downloaded key as ~/aws-keys/reverse-proxy-aws.pem. Now, I will login using the key.
Check your dashboard for the public ipv4 DNS from the dashboard. Usually, the username for Amazon Linux AMI is ec2-user. So, the whole ssh target should look like ec2-user@<your-public-ipv4-DNS>. Replace the <your-public-ipv4-DNS> with your selected instances’ public ipv4 DNS.
$ ssh -i ~/aws-keys/reverse-proxy-aws.pem\
            ec2-user@<public-ipv4-DNS>
Copying New file via SSH
Similarly you can copy files from your local machine to the AWS EC2 instances. Here, I am copying a python script file named aws_rproxy.py to the launched instance.
$ scp -i ~/aws-keys/reverse-proxy-aws.pem\
            aws_rproxy.py\
            ec2-user@<my-public-ipv4-DNS>:~
This is how, you can launch AWS instances. Later, in some other posts, I will show how to host your applications in an AWS instance. Till then, Cheers!

Leave a comment